
Snap Together CNC Joinery
By: Jonathan Siddoway
Hello Everyone!
Here at JUMP, I set out to find a way to join wood together without needing screws or glue. In order to do this, I decided to take advantage of the compliance found in wood (it’s ability to bend without breaking).
This is a follow up on my CNC Machining Common Materials Blog. So if you haven’t seen it, please check that out first!
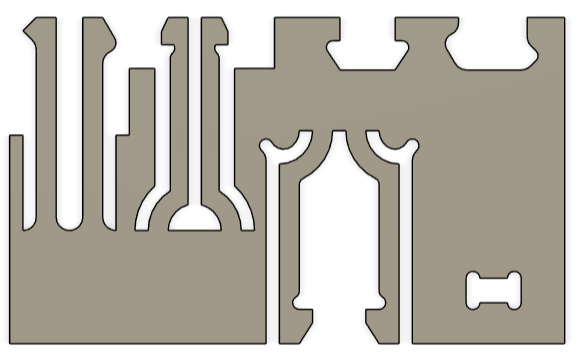
An image of the first test clamps
I started off making a number of different clamps to test which variant would perform best.
Early on I noticed there are two major factors to take into account when making clamps
Endmill Diameter
Material Thickness
The endmill diameter determines the minimum cut spacing in between the clamps and also determines how large the dogbone will be (dogbones will be explained later)
The material thickness is important because as a material gets thicker, the clamps become harder to bend.
In my case I was using .4”-.5” thick plywood and was using a 1/4” endmill to cut everything out.
The clamps second from the left (in the image above) worked amazingly on the first attempt so all future designs were built around that
Clamp Design
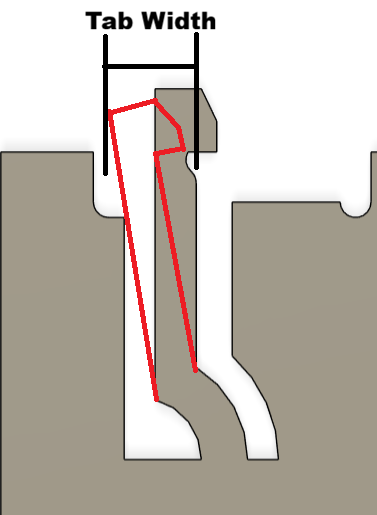
The question of HOW to make a functional clamp is what this section aims to tackle.
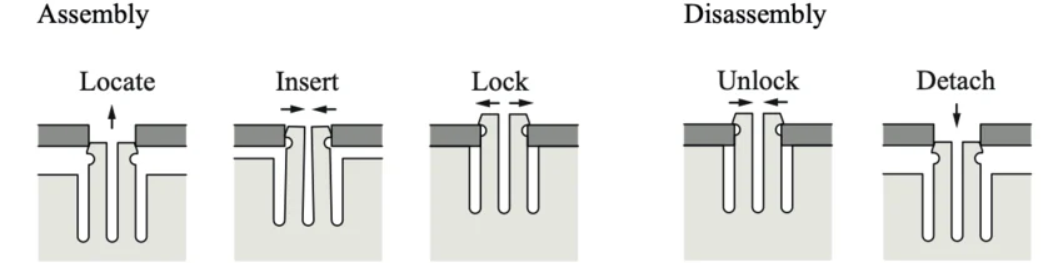
The clamps work by compressing together to allow for a separate material to slide over before the clamps expand locking the separate material in place. (reference image above)
The endmill diameter (Ø) determines the spacing between the cantilever and the stock while Material thickness drives the dimensions between the clamp and the stock.
Note: the “material thickness” between the clamp and stock should be the thickness of the separate material we are clamping onto
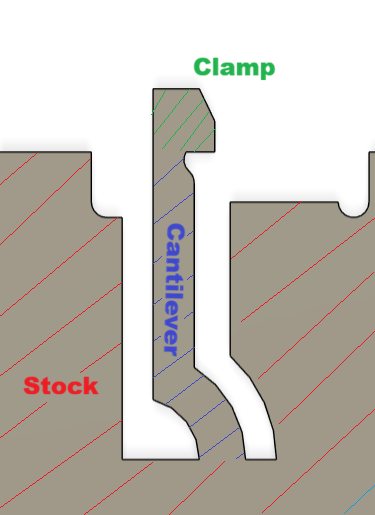

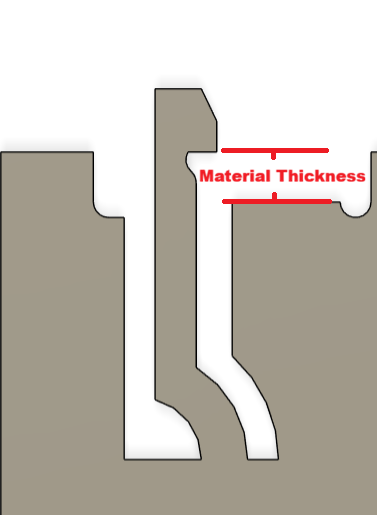
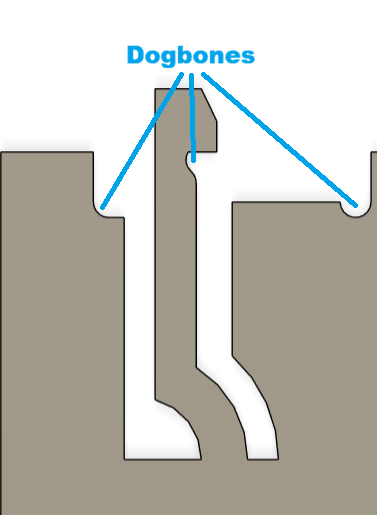

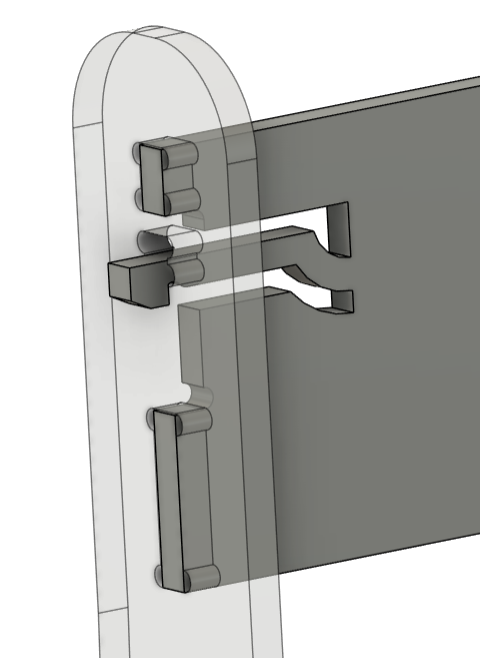

Diagram of how Dogbones work. Credit: Hammerspace
Another essential part of the design is “Dogbones”.
Endmills are all circular and by extension - can’t cut out square corners. This means that if you want two materials to sit flush against each other, you must cut further into corners to remove the unintended fillet.
Simply said, Dogbones are used to allow the CNC to make flat faces for 90° inside corners.
For clamps, Dogbones are needed in the 3 areas shown above (every corner where the two pieces are joined together)
Now that we have the clamps made, we need to figure out how to make the slots they fit into!
The slots themselves are just rectangles with dogbones on all corners. The important idea is what size to make them.
The height is determined by the thickness of the material the clamps are made of.
Finding the exact width needed is complicated, but luckily with one clamp, it doesn’t need to be very precise. As long as your slot is bigger than the size of your cantilever and endmill combined, plus an extra .125” in the direction it bends, the clamp should fit through it.
Note: The chair I made using these clamps also included standard slot joints to increase connection strength and help with alignment.
My Design
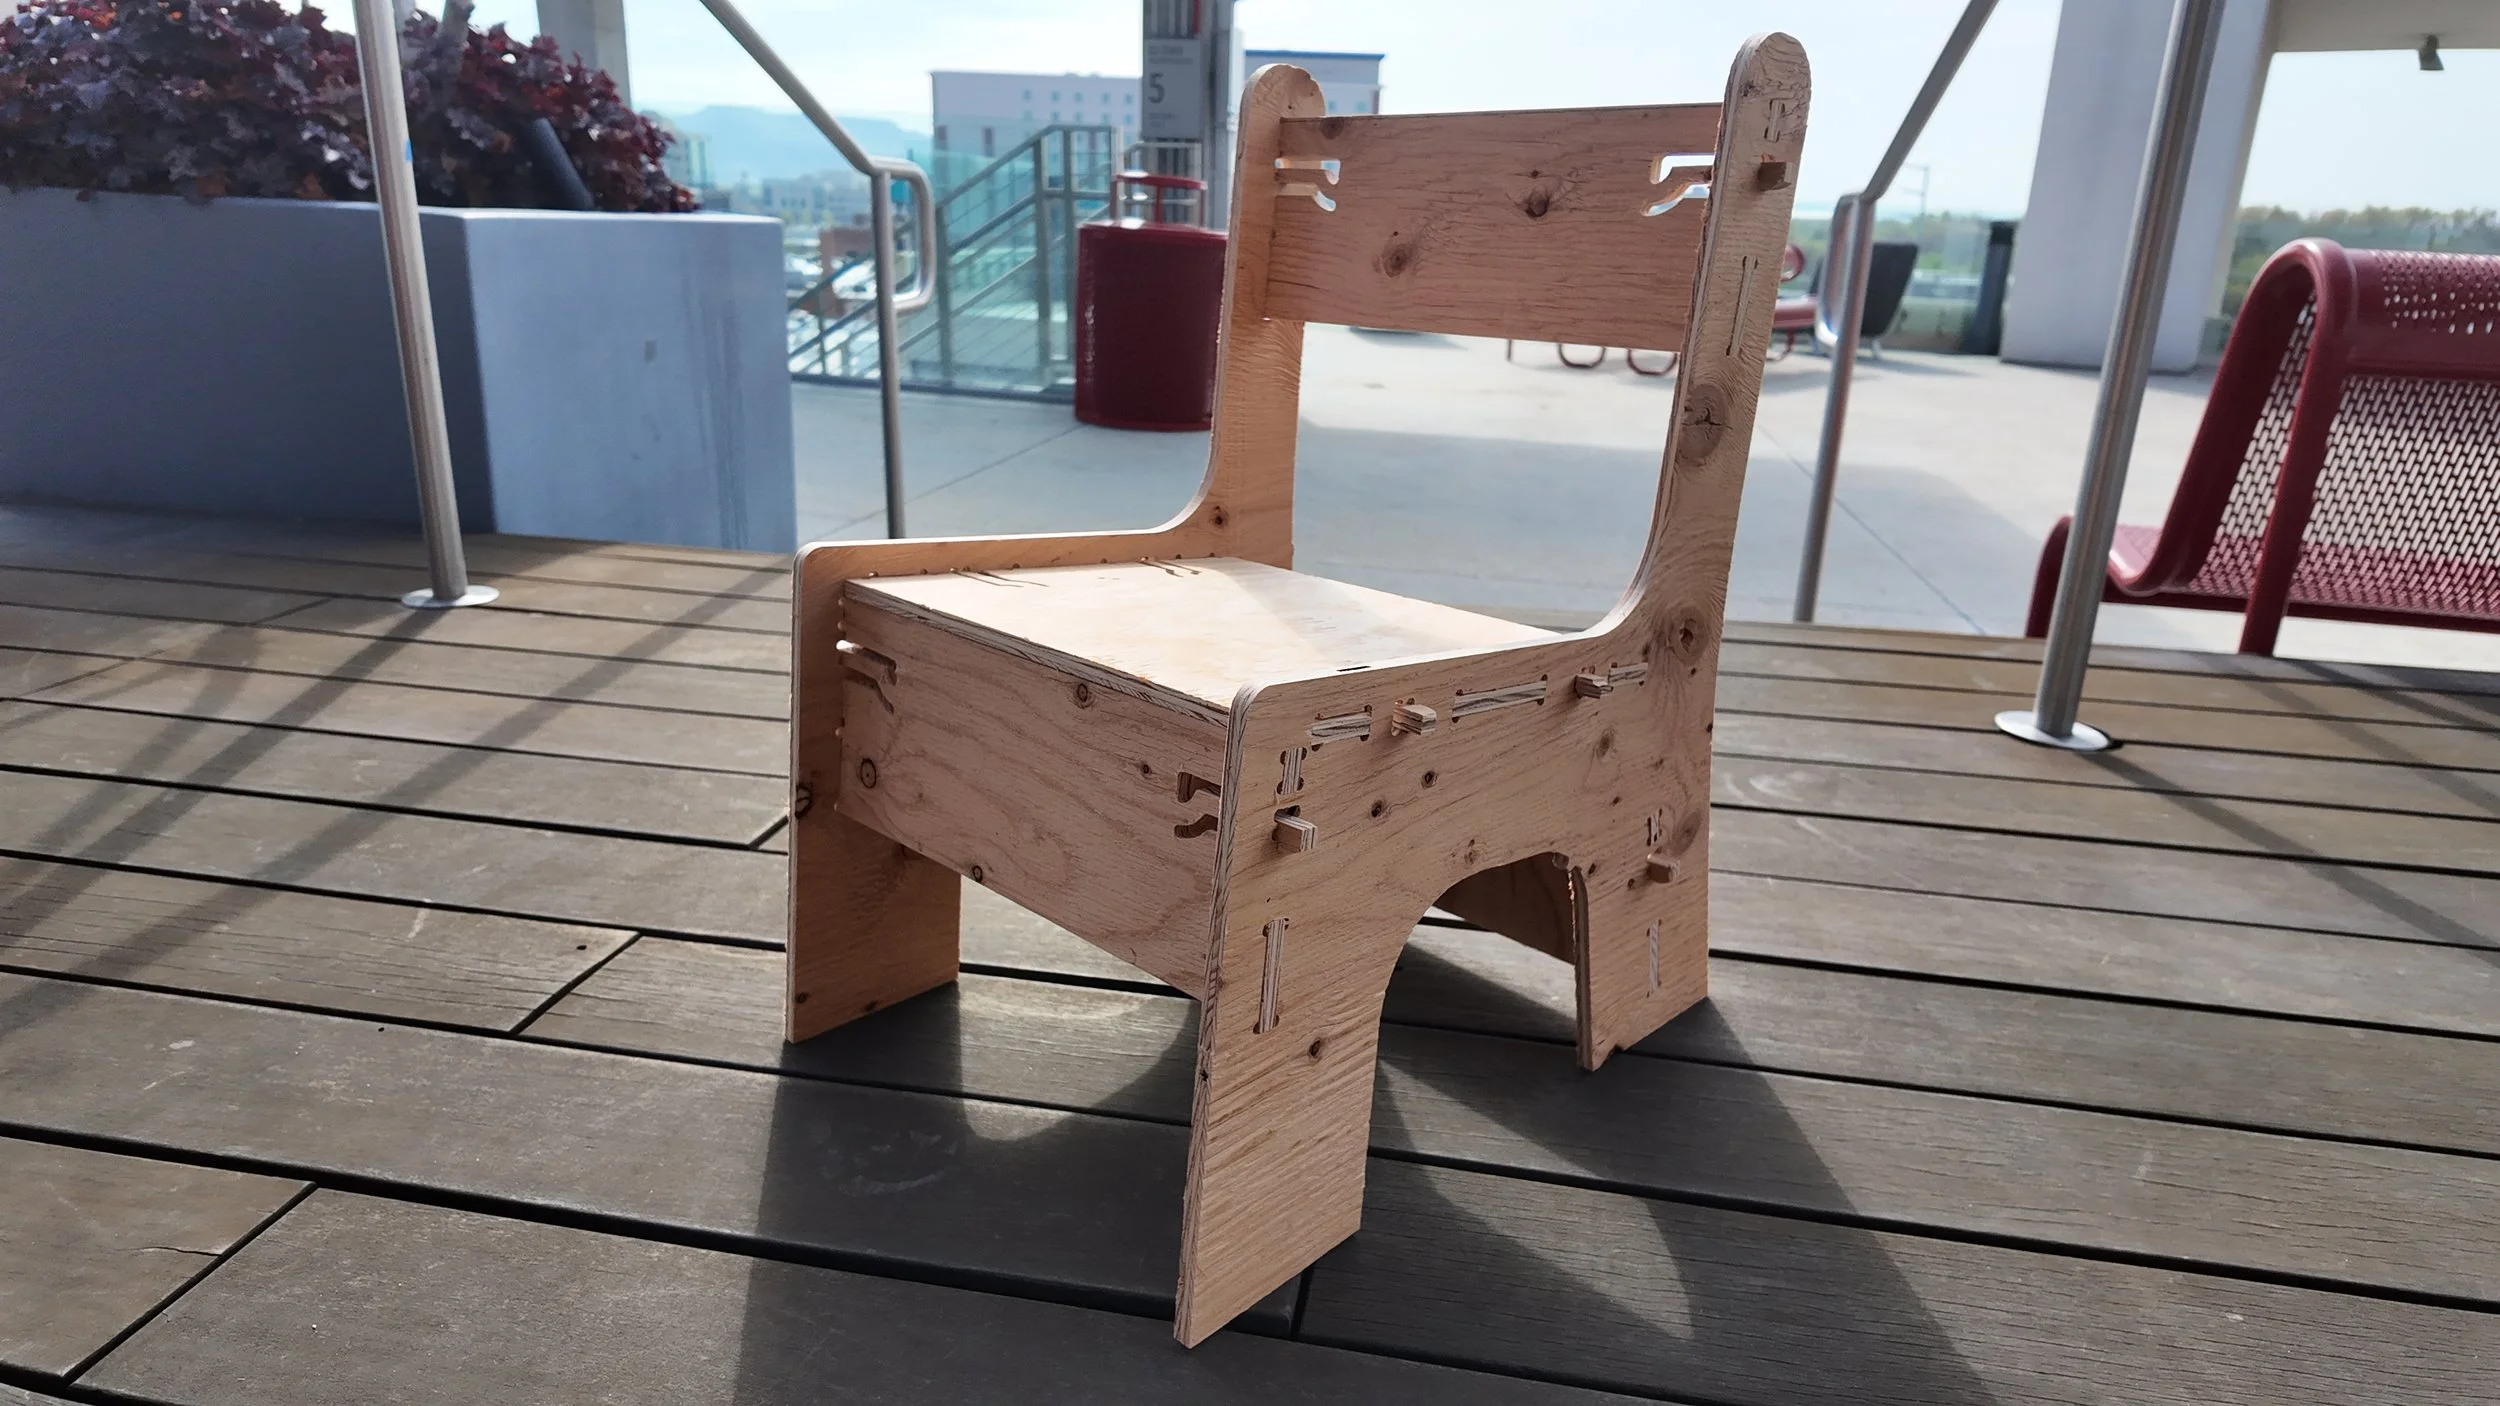
I decided to design a small chair that held itself together only with these clamps and standard slot joints to assist with strength, stability, and alignment.
With plywood stock that was .435” thick, I found that the wood could bend comfortably with the combined length of the cantilever and clamp at 3-4 inches.
The cantilever thickness and clamp stickout, were numbers I decided to test randomly when making the initial clamp tests. These dimensions ended up working with my stock thickness, but may need to be changed based on material.
Adjusting Dimensions For New Projects
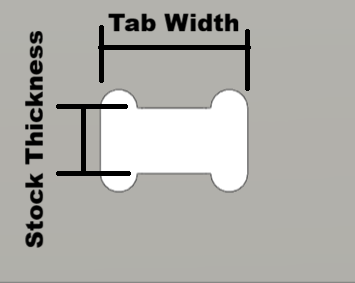
Stock Thickness: If the new stock thickness is more than .5”, The distance between the clamp and stock needs to increase to match it and the cantilever needs to become longer or thinner to maintain its ability to bend.
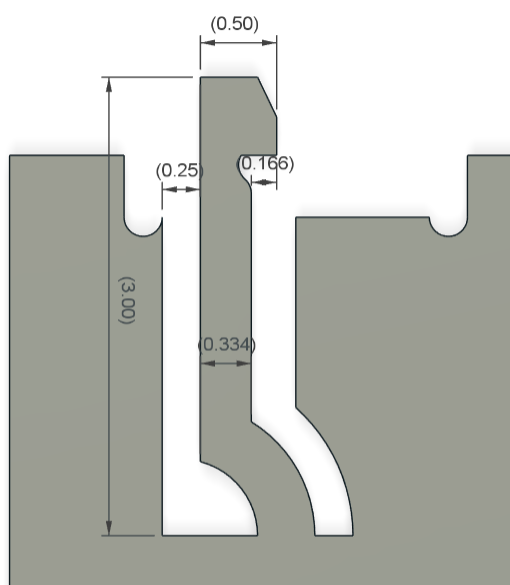
An image showing the clamp with dimensions on it
Endmill diameter: If the endmill diameter increases, the size of all dogbones will increase to fit the new endmill and the spacing between the cantilever and the stock will increase to match the endmill diameter.
Conclusion
That is everything I’ve learned in the short time I’ve spent creating this clamp joinery.
It is amazingly satisfying to have a chair ‘click’ itself into place without needing to get out a screwdriver or glue.
The potential of these clamps is relatively untapped, and there’s so much still left to learn about their design and applications.
I hope this has been a helpful entry into snap together CNC joinery. Go out there and make cool things!
-Jonathan Siddoway